Showing posts with label Canon Pixma. Show all posts

Friday, June 06, 2014

Fun at the Canon PIXMA 'We Are Family' Craft Workshop

Workshop 7

We had a great start to our holidays, at the Canon PIXMA We Are Family craft workshop. We arrived just on time, and immediately, we could see how everyone was excitedly wirelessly printing out their photos at the numerous printer stations around the room. This mummy was of course excited, but EV was a little hesitant, as she took in the entire situation. She must be wondering, where did mummy bring me to this time?

The moment she spied the foam letters and numbers on a table, her fears disappeared. She made a beeline for that table, and started picking letters and numbers. I say picking, because she refused to pick letters to any words that I suggested, like love or family. She just wanted to randomly pick the letters and numbers. I let her be. As long as she’s having fun. Once, I even caught her alone at the table, having fun with the hole puncher, punching away.

Workshop 1

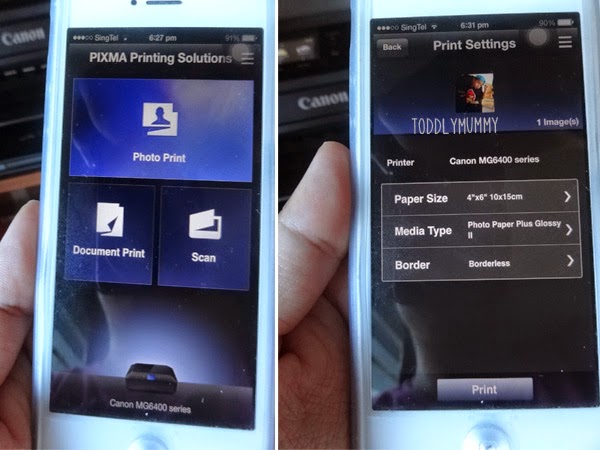
While spying her enjoying herself, I was busy printing my photos using the PIXMA Printing Solutions App and Wi-Fi connectivity. As I had already tried this at home with the Canon PIXMA MG6470 printer, I decided to try this with the no-button Canon PIXMA MG7170 printer. The folks at Canon had made the process extremely easy, and all participants had to do was to wirelessly connect to the printer of their choice. I was able to quickly print the photos in my phone.

Workshop 2

The workshop itself started soon, with the on-stage teaching of the craft of the day – a door greeter. As the two presenters were going through the instructions, which are also shown on the screens, it was helpful to have Canon folks around to assist and answer any queries we may have if we didn’t quite catch the instructions.

Workshop 3

Slowly and steadily, we finished our craft. I let EV decide how she’d like the frame to be, from the choosing of the photo, to the embellishments she wanted to put on the frame itself. She decided to use a photo of herself taking a bite, which I had snapped just before the event. In true EV manner, she stuck the foam letters and numbers randomly on the frame. She also took a liking to a green marker, and used it to add some decoratives to the frame.

Workshop 4

After a short break, we returned to the workshop again to work on a  family diorama, where we were to use a family photo, and add some embellishments to it. Once done, we were supposed to add our diorama to another bigger diorama, made up of all the dioramas of all the families participating in the workshop. However, EV being EV, she wanted to do the diorama in her own way. She also refused to take part in the group photo taking at the end, preferring to play with the musical note hole puncher. Here’s her version of her diorama.
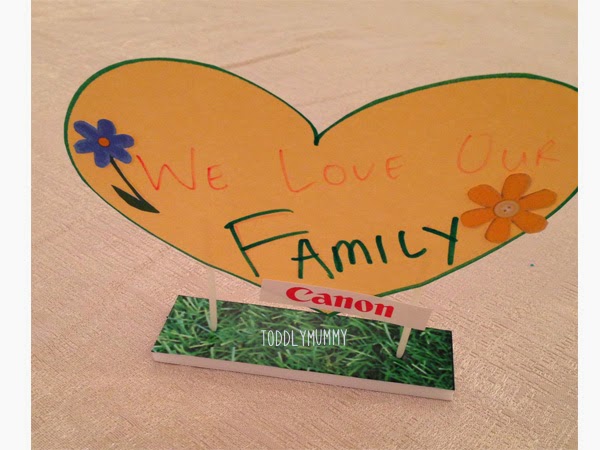
Workshop 8

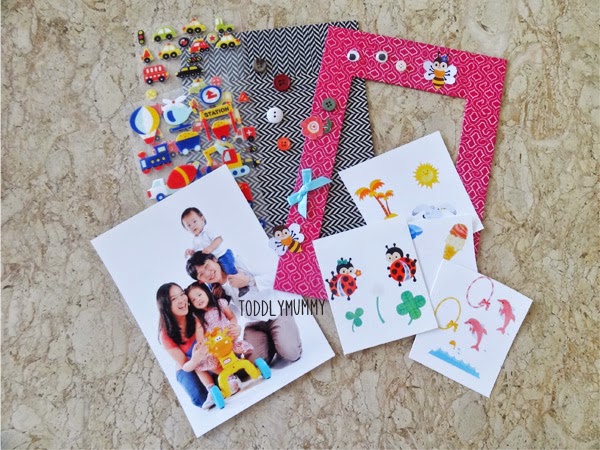
Because AA couldn’t join us, we decided to do the door greeter craft at home too, so that the baby of the family can also enjoy doing it. I cut out the frame, and used washi tapes to wrap the frame, both front and back.
Workshop 5

Then using embellishments that can be downloaded from Canon Creative Park and felt stickers, AA (with lots of help from mummy and EV, while DaddySay snapped away) created his own door greeter! Because family is all about sharing and doing things together. Because family matters.

Workshop 6

I’m really glad to have had this opportunity to participate in this project with Canon PIXMA. Printing photos is now even more convenient for me. Like the other day, AA’s play group needed a family photo. All I did was to quickly print it using the Canon PIXMA MG6470 the night before, and put it in his bag. No more going down to the photo shop to do so. I also like the fact that I can print photos taken with my phone directly to the printer. Definitely saves a lot of time for me, almost instantaneous. Thank you Canon PIXMA!!

This post first appeared on the OMY Canon PIXMA 'We Are Family' Craft blog. Do hop over to check out more kid-friendly, fun and easy activities by fellow bloggers. Or, read more of our family craft projects!

Disclaimer: We were provided with a Canon PIXMA MG6470 printer as part of the Canon PIXMA 'We Are Family' project. No monetary compensation was received. All craft ideas, opinions and images are my own.

**********

Thank you for reading. If you like this post, please do connect with me on FacebookInstagram and Twitter, so I can share our fun adventures, thoughts and exploits with you. 

Tuesday, June 03, 2014

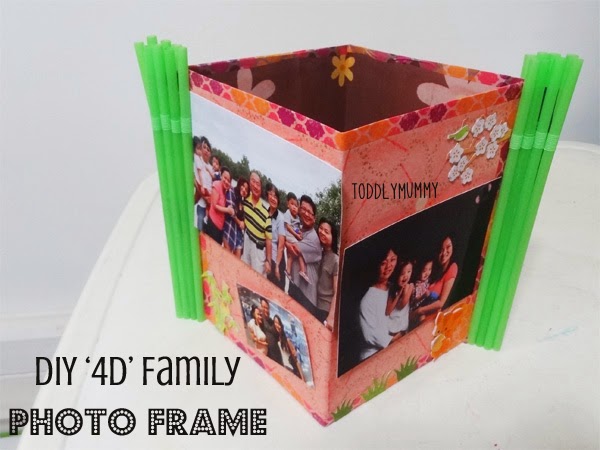
DIY '4D' Family Photo Box Frame

The weekend before the holidays, EV, AA and me did some crafting as a little preview, before the Canon PIXMA 'We Are Family' Crafts workshop. Here’s what we did.

Photo frame 10

The DIY ‘4D’ Family Photo Box Frame that I’m sharing is a wedding anniversary gift for my parents. It uses mostly recycled materials. We love using recycled materials in our home. It’s simple, cost effective and teaches the kids that you don’t have to spend money to have fun. What’s more, it really stretches their creativity.

Here are the materials needed:
1 recycled cereal box (about A4 size)
Adhesive velcro strips or dots
16 green coloured straws
Washi tape
6-8 photos of your own choice
4″ x 6″ photo paper (We used Canon Photo Paper Plus Glossy II PP-201)
A4 matte photo paper (We used Canon Matte Photo Paper MP-101)
Glue
Scissors

How to:

Photo frame 1

Cut the cereal box so you get two A4 size cards with flaps at both short ends.

Photo frame 2

Fold the cards into half. Unfold.

Photo frame 3

Locate the folded line between one card and the flap. Cut until halfway, leaving the other half uncut. Repeat for the other card.

Print patterned paper and 3D stickers using the matte photo paper. They can be downloaded from Canon Creative Park. We chose a Japanese theme. I thought it was really apt, since my parents met and fell in love in Japan.

Photo frame 4

Photo frame 5

We also decided to try out the PIXMA Printing Solutions App, which makes use of Wi-Fi connectivity for wireless printing. It was relatively easy to set up, and though my Wi-Fi connection dropped occasionally, I successfully printed my downloads directly from my smartphone on the second try! Quick, effortless. I can also directly print out photos taken with my phone.

Photo frame 6

Trim the patterned paper slightly, if necessary. Then glue the paper on to both sides of the two cards. Set aside to try.

Print your family photos using the 4″ x 6″ glossy paper. We printed four photos in full size, and four smaller ones that measure 5 x 7cm. Using the My Image Garden software that works with the Canon PIXMA MG6470 printer, we could easily specify the photo sizes before printing them out.

Photo frame 7

To make the frame, put one card above the other card, with the cut folds facing each other. Slide the cards together so they make a boxed frame.

Photo frame 8

Glue the flaps together. Stick washi tape all around the frame. Glue the green straws to the flaps to resemble bamboos. Leave to dry.

Stick adhesive velcro strips or dots to the back of the full-sized photos and to each of the four sides of the boxed frame. Attach the photos to the frame. The velcro allows the photos to be changed and new ones put up, at any time.

Cut out the 3D sticker designs and follow the instructions provided to make them. Glue them to the frame.

Photo frame 9

Ta-da! A DIY ‘4D’ Family Photo Box Frame! A perfect gift for the grandparents that includes a photo from our first three-generation family trip.

For more craft ideas, do visit Canon Creative Park and Canon PIXMA Town.

In the meantime, stay tuned for our sharing of our adventure at the Canon PIXMA We Are Family Crafts workshop.

This post first appeared on the OMY Canon PIXMA 'We Are Family' Craft blog. Do hop over to check out more kid-friendly, fun and easy activities by fellow bloggers. Or, read more of our family craft projects!

Disclaimer: We were provided with a Canon PIXMA MG6470 printer as part of the Canon PIXMA 'We Are Family' project. No monetary compensation was received. All craft ideas, opinions and images are my own.

**********
Thank you for reading. If you like this post, please do connect with me on FacebookInstagram and Twitter, so I can share our fun adventures, thoughts and exploits with you. 

Tuesday, May 20, 2014

DIY Family Photo Fridge Magnet

Photo magnet 8
The DIY family photo fridge magnet that I’m sharing is my first photo-related craft in a long time. Reason being, my old printer has broken down and I’ve been too lazy to head to the photo shop to print photos. Plus, with the kids, the focus has been on making crafts for them and with them, and my own love for scrapbooking has taken a back burner. So thanks to Canon PIXMA for roping me into this awesome family oriented project, and getting my hands itchy again!

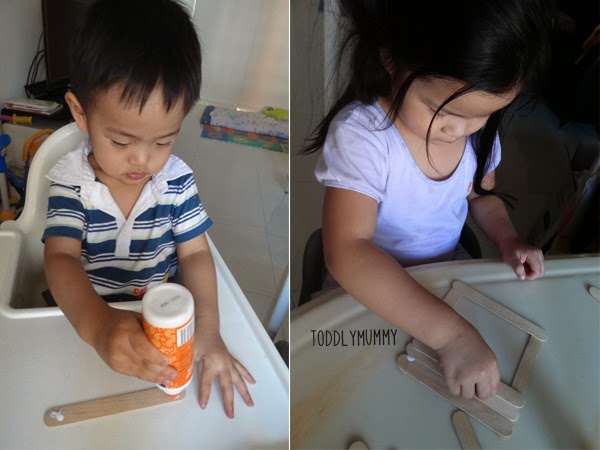
It was truly a family project for us. EV chose the pictures, put the frame together and stuck the embellishments, with some help from me. AA helped with the frame while DaddySay gave us moral support, from in front of the TV (hee!)

Here are the materials needed for two magnets:
20 ice cream sticks (thick)
4 adhesive magnetic strips
2 photos of your own choice
4" x 6" photo paper (We used Canon Photo Paper Plus Glossy II PP-201)
A4 matte photo paper (We used Canon Matte Photo Paper MP-101)
Glue
Scissors

How to:

Photo magnet 1
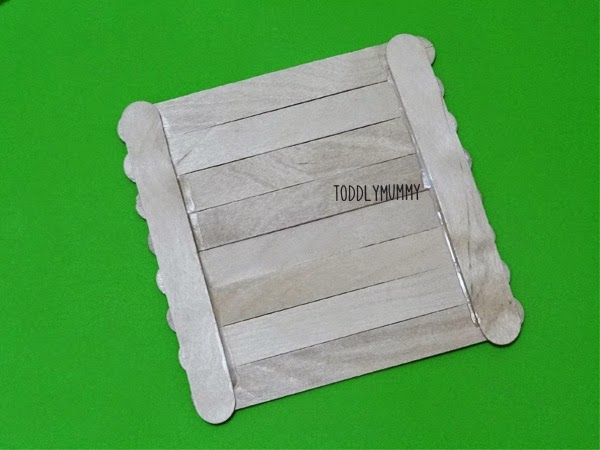
To kick off this family portrait project, glue the ice cream sticks together to make the frames. For each frame, stick eight sticks side by side, with two sticks at the back (top and bottom) to secure the other eight sticks together. Set aside to dry.

Photo magnet 2
Print your family photos, as well as the patterned paper, tags and 3D stickers that can be downloaded from Canon Creative Park. Print the photos using the 4" x 6" glossy paper, and the rest of the materials with the matte photo paper.

Once dry, this is what the final frame looks like.

Photo magnet 3
Stick the adhesive strips on the two sticks at the back.

Photo magnet 4
Cut the patterned paper to size, and glue them to the frames, one patterned paper for each frame. Stick the photos on top of the paper.

Photo magnet 5
There are many tags and 3D sticker designs that you can choose from. Make your choice then cut them out. Glue them to the frame. For the 3D stickers, follow the instructions provided to make them.

Photo magnet 6
There you have it! A completed DIY family photo fridge magnet!

For more craft ideas, including paper crafts like animals and vehicles origami, do visit Canon Creative Park and Canon PIXMA Town.

Photo magnet 9
Did I tell you that Canon PIXMA printers print wirelessly, thanks to its mobile printing solutions that allow printing from a phone, tablet, or even the cloud? Definitely makes printing so much more convenient.

This post first appeared on the OMY Canon PIXMA 'We Are Family' Craft blog. Do hop over to check out more kid-friendly, fun and easy activities by fellow bloggers. Or, read more of our family craft projects!

Disclaimer: We were provided with a Canon PIXMA MG6470 printer as part of the Canon PIXMA 'We Are Family' project. No monetary compensation was received. All craft ideas, opinions and images are my own.

**********

Thank you for reading. If you like this post, please do connect with me on FacebookInstagram and Twitter, so I can share our fun adventures, thoughts and exploits with you.