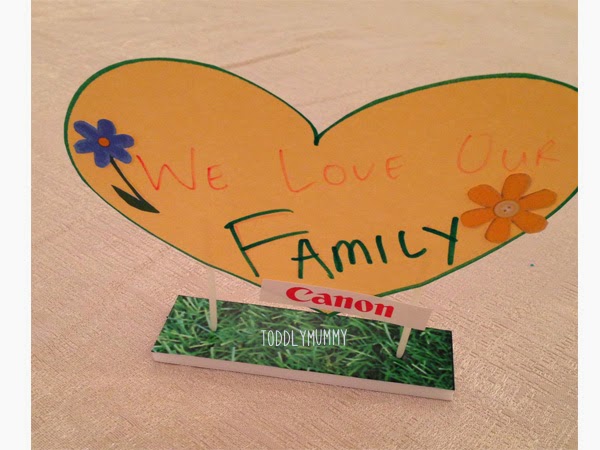
Showing posts with label Craft fun. Show all posts

Monday, November 14, 2016

9 (plus 1) pocket-friendly holiday activities under $50

Yey!!! The holidays are upon us again! It’s coming up next week. If you are, like me, looking for some wallet-friendly ways to entertain the kids, and letting them learn something at the same time, I’ve got recommendations for 9 non-academic holiday activities.

Nature Exploration @ Singapore Botanic Gardens
Singapore Botanic Gardens

This is our long-time favourite. Holiday activities range from 1-hour storytelling sessions, tours or craft & drama sessions costing just $6 per child, to 4-hour ‘Celebrating WildLife’ workshops at $50 per child. This holiday, kids attending the these workshops can learn about freshwater streams & ponds, birds of the night and creepy crawlies. 
And if the kids are not tired after the sessions, and you want to do something more exciting, have a little picnic by the Swan Lake where the kids can run amok, or head to Jacob Ballas Children’s Garden. Find out more or register here. 

Science Fun @ Lollipops
Lollipops

Another of our favourites, and we always keep an eye on what they have to offer. For December, kids can learn about life sciences and be ‘Little Doctors’, learn about the science in cooking while making lollipops and edible glass, or learn all about dinosaurs in three sessions. The classes are conducted at various community centres across the island, and prices range between $38 and $50. The 3-day Dinosaur workshop costs between $114 and $130. Members enjoy the cheaper rates. Suitable for kids aged 5 to 10 years old.
Find out more about Lollipops activities here.
Or head to the OnePA site and search for ‘Lollipops’.

Explore Science @ EJ Creators
EJ Creators

There are more cost effective courses through the OnePA site, like the ones by EJ Creators. They are holding three types of courses - Amazing Fun to learn about robotics and logical thinking, Eco Kids to learn about to learn about the environment and recycling, and The Fairy Lamp to learn about electronics and have some hands-on experience with light bulbs, batteries and circuits. Prices range between $18 and $23. Suitable for kids aged 5 to 8. Find out more by heading to the OnePA site and searching for ‘EJ Creators’.

Explore STEM @ Bricks 4 Kidz
Bricks 4 Kidz

Some of you might be familiar with Bricks 4 Kidz, which is located at Safra Toa Payoh and Turf City, and focuses on imparting engineering, mechanics and architecture knowledge using LEGO and DUPLO bricks. Holiday workshops at their Toa Payoh branch ranges between $190 and $580. This holiday, however, the folks at Bricks 4 Kidz are bringing two holiday programmes to community centres. These are Despicable Brick Minions, during which kids will create their own minion story with mosaics, create their favourite 3D characters and motorized models. The other workshop is Interesting Inventions, where kids will learn the difference between an invention and a discovery, learn how inventions solve problems, find out how inventors get their ideas patented and even be challenged to invent something or improve something to solve a problem. Prices range between $35 and $58, and the workshops are suitable for kids aged between 5 to 10 years old. Find out more by heading to the OnePA site and searching for ‘Bricks 4 Kidz’.

Science Exploration @ KidsSTOP
Science Centre

Some nice activities here about chemistry, environment and physics. The chemistry workshop looks quite interesting, as the kids will also get to make their own bath salts, while honing their inquiry and investigation skills. Even more intriguing is the physics workshop called Spring Fling Junior. Kids get to play with springs and rubber bands and attempt to make their own toys out of these basic materials. Prices are at $45 for each 2.5-hr workshop, and there are different sessions for different age groups, ranging between 4 and 8 years. Find out more about KidsSTOP activities here.

Chinese art exploration @ InnoArt
InnoArt

Both my kids have been going for holiday art classes elsewhere, and this time, I thought it would be nice if I infuse a little Chinese culture into their holiday programme. What I like about the programme at InnoArt is its flexibility. Kids can sign up for half-day sessions, or even 5-day sessions. Or kids can mix and match several half-day sessions to be exposed to different art forms. Just tell the folks which day or days your kids will be joining. Half day (am) is from 10-12pm and costs $50, while half day (pm) is from 1.30-5.30pm and costs $90. There are different classes for ages 4 to 8 years and 8 to 16 years. Find out more about InnoArt activities here.

Craft and bake @ Spur Box
Spur Box
How about an all-in-one storytime, baking and crafting session, for just $40? The folks at Spur Box have created several Christmas themed Junior Gourmet session where kids between the ages of 2 and 12 years old can listen to stories, bake and craft. Some of these include the Cocoa Logcake session, where kids can listen to the story of The Little Christmas Elf, bake a chocolate log cake and craft and elf key chain. Those who head to the Snowman Cakepops session will listen to the tale of Frosty the Snowman, make cake pops and a snowman craft. Find out more about Spurbox activities here.

Sports activities @ ActiveSG
ActiveSG

Want to expose the kids to a plethora of sports activities? ActiveSG has a range of sporting activities such as aquatics, archery, snorkelling, kayaking and ultimate frisbee. There’s even an opportunity to get behind the scenes and find out all about the operation of a public swimming pool and the job of a life guard.
And if you are a Singapore citizen or permanent resident, as well as an ActiveSG member, you can use ActiveSG dollars to offset up to 30% of the programme fees. Find out more about ActiveSG activities here. 

Bouncing Fun @ Beary Fun Gym
BearyFun Gym

Get more trampoline fun and brush those trampoline skills with a 2-hour guided programme at Beary Fun Gym’s Changi outlet. For $30 per session, kids 4 to 10 years old get 1 hour guidance on those jumping skills, and 1 hour of free play. If you prefer for your kids to have better gymnastics skills, then the Bukit Batok branch has a similar 2-hour guided programme which focuses on fitness circuits, parachute games and manipulative games, for just $30 per session. Find out more about Beary Fun Gym activities here. Or check out Beary Fun Gym’s Facebook page.

Speech & Drama @ Magic Moments
Magic Moments
So far, many speech & drama holiday courses that I’ve come across cost at least a couple hundred dollars. Imagine my surprise when I found something that cost just $100 for a 3-hour programme over 4 days! Ok, granted, that isn’t exactly less than $50, as this post’s title says. However, if you do the calculation, the average price per day is only about $25. I think that’s extremely economical. This holiday programme is conducted in both English and Mandarin, across several community centres and is suitable for kids aged 4 to 8 years old. Find out more by heading to the OnePA site and searching for ‘Magic Moments’.

**********


Thank you for reading. If you like this post, please do connect with me on Facebook, Instagram and Twitter, so I can share our fun adventures, thoughts and exploits with you. 

Monday, July 13, 2015

Waddle waddle waddle belly slide! All about Penguins (Home Learning)

Before the June holidays, we did a home learning theme on penguins. It was triggered by a conversation we had about a trip we made to the bird park previously, and the kids shared how they liked the way the penguins waddle.

I tried to make the penguin theme as holistic as possible, injecting factual information, fiction stories and craft. For fiction books, I chose Oliver Jeffer's books - Up and Down and Lost and Found.

Penguins 4

EV and AA loved the penguin inside the books, and repeatedly ask for both to be read to them. Very often, I would use our reading sessions to conduct a simple comprehension exercise to access their understanding of the print story and their inferences of the visuals they see. For example, when they see the visual of the penguin standing alone on the ice, away from the rest of the penguins, how did they think the penguin felt? I feel that such an activity can help EV and AA understand the stories on a deeper level, and also helps to build their visual literacy. 

Chinese books play an important part of our home learning journey, and of course, it was no exception for this penguin theme. We got books from the library shared facts and stories about penguins in Mandarin. There is also this heartwarming tale about how parent penguins love baby penguins from Flip for Joy that we enjoyed reading.

Penguins 12

Penguins 9 

We engaged in simple comprehension activities in Mandarin, similar to what was being done during our English sessions, so that EV's and AA's narrative understanding and visual literacy can transcend different languages.

Penguins 5

Besides narrative stories, I also introduced non-fiction books so EV and AA can learn various facts about penguins, such as their biology, living environment and so on. One of my favourites is this book by Miles Kelly. It is filled with very realistic pictures and information is presented in bite-size snippets, which are extremely easy for little kids to digest.

Penguins 11

As a follow-up, we also had some whiteboard time, where we reviewed what we learnt about penguins.

I printed penguin-themed worksheets online, pegged at different levels to suit EV and AA.

Penguins 7

Penguins 1

I also designed worksheets for EV, focusing on comprehension of poems about penguins. It was something she found interesting to do, because some of the poems are sung to the tune of nursery rhymes that she is familiar with.

Penguins 6

For our penguin craft, we recycled plastic bottles. The ones we used are the large ones from Watson’s, which are nicely curved to be able to pass off as penguins. I got the kids to paste paper all around the plastic, and when they dried, they painted their penguins.

Penguins 2

Penguins 3 

EV decided to be different and painted her penguin red, with her fingers. AA decided to use his fist. Later, we added felt wings and beaks, and foam eyes. EV’s in a ‘red’ stage now, so her red penguin just has to have red wings. 

Penguins 10

These penguins may not be able to head into the water, but they sure can keep the kids’ imagination going. 

What home learning activities are you doing? Do share!

**********

Thank you for reading. If you like this post, please do connect with me on Facebook, Instagram and Twitter, so I can share our fun adventures, thoughts and exploits with you. 

Tuesday, February 24, 2015

Play Learning Tuesday: Cardboard Farm

It’s been quite a while since we last shared on Play Learning Tuesday. But today, we’re back again, and we hope to share more of our fun play learning activities.

Today, we’re sharing a cardboard project that we did, in line with the farm theme at EV’s pre-school. It was a rather big project, and need the help of AA too, though I don’t think he minded.

Materials needed
Cardboard box
Green and blue paint
Felt in various colours
Ice cream sticks
Cotton wool for the clouds
Blue foam for the pond
Egg cartons
Scissors
Glue

Firstly, I got EV and AA to paint the outside of the box green. For the inside, they painted the top half blue for the sky, and the rest green for the grass.

Cardboard Farm 1

Decorating and adding details inside is really easy. There are no specific details as to what to add. I basically let EV take the lead and decide what she wanted in her farm. She decided she wanted a barn, which AA helped to make as well, using ice cream sticks. 

Cardboard Farm 2

Cardboard Farm 3 

Then she wanted an apple tree, so we made one using green, brown and red felt.

Cardboard Farm 4

Finally, she wanted a pond for the ducks. She even made her own ducks out of white felt, added cotton wool for the clouds, and even gave the pigs their own feeding trough made out of egg cartons.

The kids then made their toy farm animals move house, from the toy box to the newly created cardboard farm. The animals look like they are liking their new home.

Cardboard Farm 5

There are quite a number of learning possibilities besides the creativity, such as:
- Literacy - describe the farm, the farm animals, what they are doing, how they are feeling, focus on words associated with ‘farm'
- Numeracy - count the animals, simple addition and subtraction as the animals move into the barn to rest
- Science - discuss the body parts of the farm animals: webbed feet, hoofs, beaks etc

So there, an easy-to-made cardboard farm. There are a few steps to making it, but the bonding with the kids is just great.

What cardboard creations are you making today? Do share!

**********

Thank you for reading. If you like this post, please do connect with me on Facebook, Instagram and Twitter, so I can share our fun adventures, thoughts and exploits with you. 

Monday, June 23, 2014

Review: iNbox

There's a new kid in town, I mean, a new craft-in-a-box. Called iNbox, the latest is by the educational toy store Smart Alley. I think it makes logical sense for them to jump on the bandwagon. They are already selling educational craft items at their store, so iNbox is an extension and reinvention of what they offer, delivered right to the doorstep. So how does iNbox's creativity, functionality and educational value fare?

The folks at iNbox ensured that the box was addressed to EV - a nice, personal touch that can be extremely meaningful and exciting for young kids. Upon opening the box, much to the delight of EV and AA on a bright morning, I was pleasantly surprised to find the box seemingly packed with materials for the activities. There didn't seem to be much empty space left in the compact box. And then as I proceeded to take some photos of the whole box, as all mum bloggers do, I gave the activities a preliminary assessment.

Inbox 1

Inbox 1a

In the Colour Scientist theme box, there are about five activities, which includes an additional bonus activity and an illustrated story book. Now this story book element is promising. So far so good. The true test is when EV gets down to it.

What I do like is the notice 'Parental Involvement Required' in the top right hand corner, which plays an integral role in reminding parents to do the activities together with their kids, even if the kids are old enough to independently do the activities on their own. What matters is bonding time that parents and kids will have together.

So on to getting dirty.

Inbox 2

Inbox 3

I like the fact that this iNbox is extremely thoughtful in providing an art apron to protect the kid's clothes and a plastic sheet to protect the working surface. These aren't the best quality, but it's the thought that counts. There is only one apron, so AA got to wear it. I think in the first My Colour Lab activity, these items are very important, because it can get dirty. The activity requires the kid to be a scientist of colours. The idea is great: put two paint colours into a plastic 'test tube', use a pipette to squeeze drops of water into the tube, screw on the top and then shake. AA joined in the fun too, so the siblings took turns to put in and shake the colours, as they discovered how to mix different colours to make new ones. 

Inbox 4

Inbox 7

There's even a nice little tray to line all the tubes of colours, just like a scientist would.

Inbox 10

EV got a little carried away at the end; she started mixing all the colours together into a dull blue. Important thing is, my little colour scientist had fun creating colours, making a mess and cleaning up after. So looks like a big stamp of approval from her.

Inbox 5

Inbox 6

The second Magical Kaleidoscope activity needed a little more help from mummy, as EV still wanted to experiment with her paint colours. What got her, and AA, interested were the stickers that they get to stick on to the circular disc. That was the simple part. The actual folding of the cardboard and the putting together of the kaleidoscope had to be done by mummy. And then it was as easy as turning the disc around to see the patterns through the eye hole. This teaches kids how things can look different, if one looks at it from another perspective. Here, stickers on a circular disc become beautiful patterns.

Inbox 8

Inbox 9

Excitement grew again during the Spray Painting activity. EV clearly loves painting, so it was nice for her to discover another way to paint - using a toothbrush. After that, she created her own activity by pasting the cut outs onto another paper to create her own picture. 

Inbox 11

The last two components of this theme box is rather rare: a board game & a story book. The board game uses the recognition of colours making it easy for kids to understand and play. The story is about a new animal who bullies other animals into doing things for him. It teaches kids about bullying and that if you really need something, all you have to do is ask nicely.

Inbox 13

Inbox 13

The iNbox we got is indeed an activity-filled box that kept EV occupied for about three hours. That's rather good, considering the fact that there are ways to extend the activities even further.

The activities do not just stretch kids' creativity and imagination, they are also educational with specific areas of learning such as sensory, gross motor and cognitive. These areas are clearly indicated at the front page of the instruction manual in pictorial format.

Inbox 14

On the last page, there is a more detailed explanation on the skills that the activity develops, the conversation topics that parents can engage their children in and how they can extend the activity in other ways. This is helpful for parents.

At $28.90 per box (plus $3.35 regular shipping) or $84 for a three-month subscription (free shipping), iNbox, with its activities, is economically priced and value for money.

Now the key is for future iNbox boxes to be as good as this one. If so, the iNbox concept could be here to stay for a long time.

**********

Thank you for reading. If you like this post, please do connect with me on Facebook, Instagram and Twitter, so I can share our fun adventures, thoughts and exploits with you. 

Friday, June 06, 2014

Fun at the Canon PIXMA 'We Are Family' Craft Workshop

Workshop 7

We had a great start to our holidays, at the Canon PIXMA We Are Family craft workshop. We arrived just on time, and immediately, we could see how everyone was excitedly wirelessly printing out their photos at the numerous printer stations around the room. This mummy was of course excited, but EV was a little hesitant, as she took in the entire situation. She must be wondering, where did mummy bring me to this time?

The moment she spied the foam letters and numbers on a table, her fears disappeared. She made a beeline for that table, and started picking letters and numbers. I say picking, because she refused to pick letters to any words that I suggested, like love or family. She just wanted to randomly pick the letters and numbers. I let her be. As long as she’s having fun. Once, I even caught her alone at the table, having fun with the hole puncher, punching away.

Workshop 1

While spying her enjoying herself, I was busy printing my photos using the PIXMA Printing Solutions App and Wi-Fi connectivity. As I had already tried this at home with the Canon PIXMA MG6470 printer, I decided to try this with the no-button Canon PIXMA MG7170 printer. The folks at Canon had made the process extremely easy, and all participants had to do was to wirelessly connect to the printer of their choice. I was able to quickly print the photos in my phone.

Workshop 2

The workshop itself started soon, with the on-stage teaching of the craft of the day – a door greeter. As the two presenters were going through the instructions, which are also shown on the screens, it was helpful to have Canon folks around to assist and answer any queries we may have if we didn’t quite catch the instructions.

Workshop 3

Slowly and steadily, we finished our craft. I let EV decide how she’d like the frame to be, from the choosing of the photo, to the embellishments she wanted to put on the frame itself. She decided to use a photo of herself taking a bite, which I had snapped just before the event. In true EV manner, she stuck the foam letters and numbers randomly on the frame. She also took a liking to a green marker, and used it to add some decoratives to the frame.

Workshop 4

After a short break, we returned to the workshop again to work on a  family diorama, where we were to use a family photo, and add some embellishments to it. Once done, we were supposed to add our diorama to another bigger diorama, made up of all the dioramas of all the families participating in the workshop. However, EV being EV, she wanted to do the diorama in her own way. She also refused to take part in the group photo taking at the end, preferring to play with the musical note hole puncher. Here’s her version of her diorama.

Workshop 8

Because AA couldn’t join us, we decided to do the door greeter craft at home too, so that the baby of the family can also enjoy doing it. I cut out the frame, and used washi tapes to wrap the frame, both front and back.

Workshop 5

Then using embellishments that can be downloaded from Canon Creative Park and felt stickers, AA (with lots of help from mummy and EV, while DaddySay snapped away) created his own door greeter! Because family is all about sharing and doing things together. Because family matters.

Workshop 6

I’m really glad to have had this opportunity to participate in this project with Canon PIXMA. Printing photos is now even more convenient for me. Like the other day, AA’s play group needed a family photo. All I did was to quickly print it using the Canon PIXMA MG6470 the night before, and put it in his bag. No more going down to the photo shop to do so. I also like the fact that I can print photos taken with my phone directly to the printer. Definitely saves a lot of time for me, almost instantaneous. Thank you Canon PIXMA!!

This post first appeared on the OMY Canon PIXMA 'We Are Family' Craft blog. Do hop over to check out more kid-friendly, fun and easy activities by fellow bloggers. Or, read more of our family craft projects!

Disclaimer: We were provided with a Canon PIXMA MG6470 printer as part of the Canon PIXMA 'We Are Family' project. No monetary compensation was received. All craft ideas, opinions and images are my own.

**********

Thank you for reading. If you like this post, please do connect with me on Facebook, Instagram and Twitter, so I can share our fun adventures, thoughts and exploits with you. 

Tuesday, June 03, 2014

DIY '4D' Family Photo Box Frame

The weekend before the holidays, EV, AA and me did some crafting as a little preview, before the Canon PIXMA 'We Are Family' Crafts workshop. Here’s what we did.
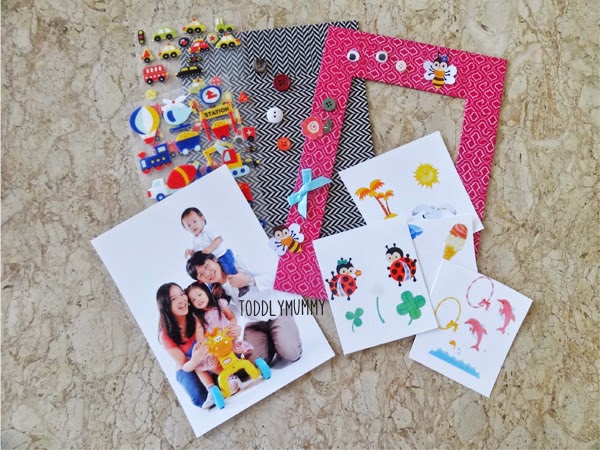
Photo frame 10

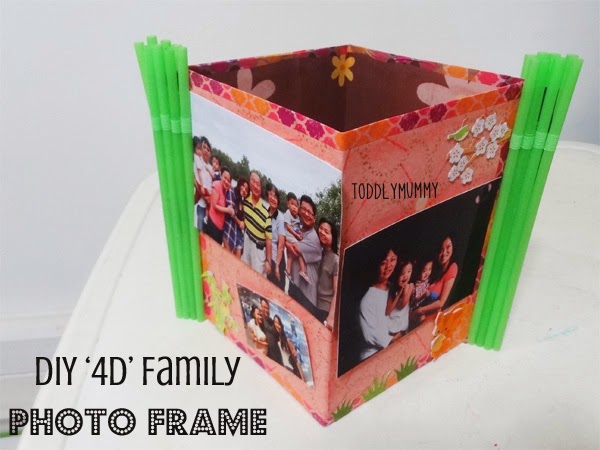
The DIY ‘4D’ Family Photo Box Frame that I’m sharing is a wedding anniversary gift for my parents. It uses mostly recycled materials. We love using recycled materials in our home. It’s simple, cost effective and teaches the kids that you don’t have to spend money to have fun. What’s more, it really stretches their creativity.

Here are the materials needed:
1 recycled cereal box (about A4 size)
Adhesive velcro strips or dots
16 green coloured straws
Washi tape
6-8 photos of your own choice
4″ x 6″ photo paper (We used Canon Photo Paper Plus Glossy II PP-201)
A4 matte photo paper (We used Canon Matte Photo Paper MP-101)
Glue
Scissors

How to:

Photo frame 1

Cut the cereal box so you get two A4 size cards with flaps at both short ends.

Photo frame 2

Fold the cards into half. Unfold.

Photo frame 3

Locate the folded line between one card and the flap. Cut until halfway, leaving the other half uncut. Repeat for the other card.

Print patterned paper and 3D stickers using the matte photo paper. They can be downloaded from Canon Creative Park. We chose a Japanese theme. I thought it was really apt, since my parents met and fell in love in Japan.

Photo frame 4

Photo frame 5

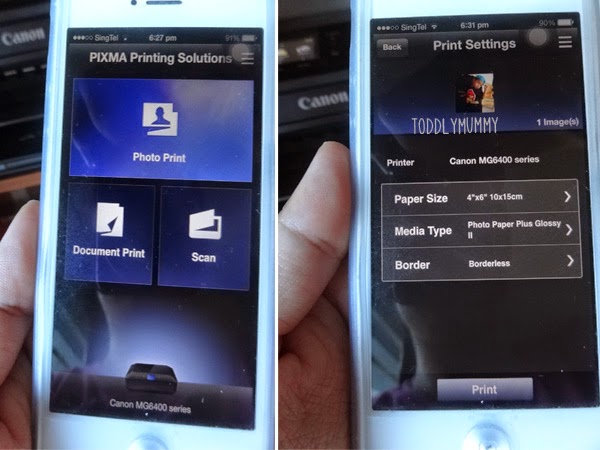
We also decided to try out the PIXMA Printing Solutions App, which makes use of Wi-Fi connectivity for wireless printing. It was relatively easy to set up, and though my Wi-Fi connection dropped occasionally, I successfully printed my downloads directly from my smartphone on the second try! Quick, effortless. I can also directly print out photos taken with my phone.

Photo frame 6

Trim the patterned paper slightly, if necessary. Then glue the paper on to both sides of the two cards. Set aside to try.

Print your family photos using the 4″ x 6″ glossy paper. We printed four photos in full size, and four smaller ones that measure 5 x 7cm. Using the My Image Garden software that works with the Canon PIXMA MG6470 printer, we could easily specify the photo sizes before printing them out.

Photo frame 7

To make the frame, put one card above the other card, with the cut folds facing each other. Slide the cards together so they make a boxed frame.

Photo frame 8

Glue the flaps together. Stick washi tape all around the frame. Glue the green straws to the flaps to resemble bamboos. Leave to dry.

Stick adhesive velcro strips or dots to the back of the full-sized photos and to each of the four sides of the boxed frame. Attach the photos to the frame. The velcro allows the photos to be changed and new ones put up, at any time.

Cut out the 3D sticker designs and follow the instructions provided to make them. Glue them to the frame.

Photo frame 9

Ta-da! A DIY ‘4D’ Family Photo Box Frame! A perfect gift for the grandparents that includes a photo from our first three-generation family trip.

For more craft ideas, do visit Canon Creative Park and Canon PIXMA Town.

In the meantime, stay tuned for our sharing of our adventure at the Canon PIXMA We Are Family Crafts workshop.

This post first appeared on the OMY Canon PIXMA 'We Are Family' Craft blog. Do hop over to check out more kid-friendly, fun and easy activities by fellow bloggers. Or, read more of our family craft projects!

Disclaimer: We were provided with a Canon PIXMA MG6470 printer as part of the Canon PIXMA 'We Are Family' project. No monetary compensation was received. All craft ideas, opinions and images are my own.

**********

Thank you for reading. If you like this post, please do connect with me on Facebook, Instagram and Twitter, so I can share our fun adventures, thoughts and exploits with you.